说在前面的话
NexT是Hexo上最有名的主题之一,大量的文字留白、简洁的配置项以及清爽的布局使得它的文字阅读体验非常好,接下来小编会向大家介绍Next主题常用的配置方法
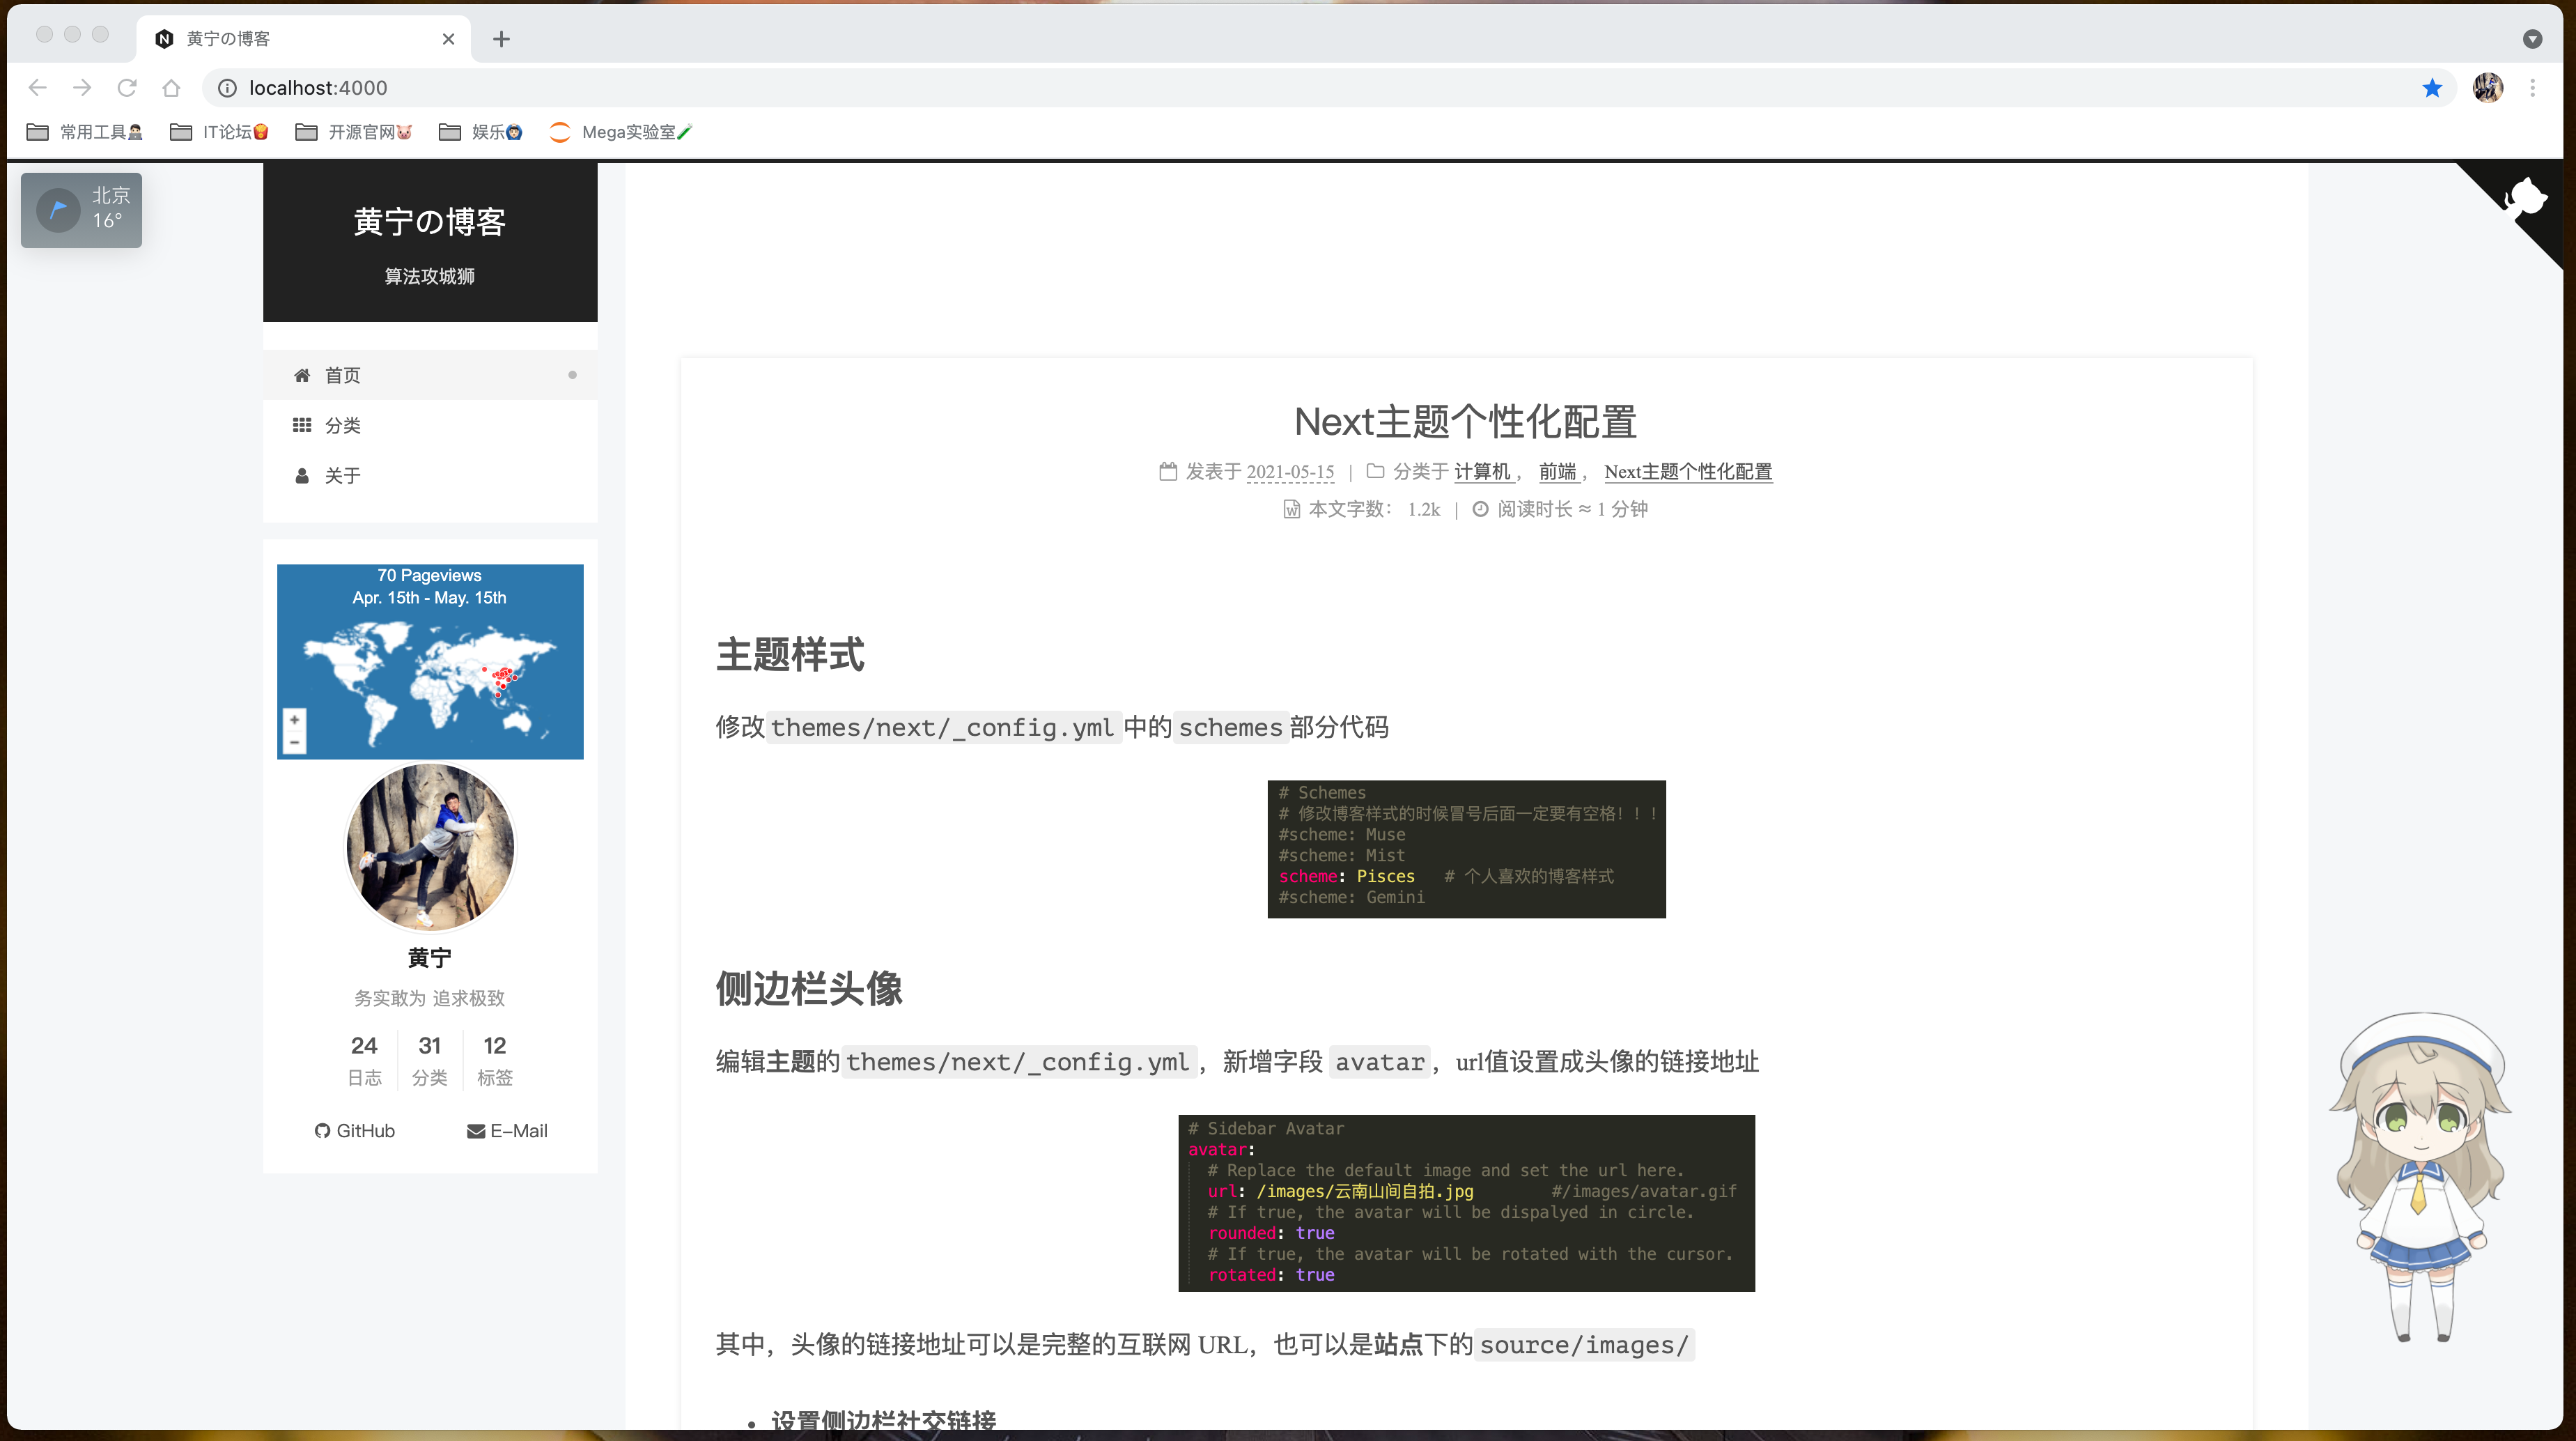
主题样式
Next主题共有四种样式,小编最喜欢清爽简约型的Pisces,这也是我最开始想要搭建博客的最主要原因,这个样式我真的好喜欢❤️。在在themes/next/_config.yml中找到Schemes字段,然后将启用的样式方案取消注释,并将其他三种方案注释掉即可
# Schemes |
修改后Next主题的样式就变成了👇
首页配置
文章添加阴影
配置themes\next\source\css_common\components\post\post.styl中的.post_block字段
.use-motion { |
修改后的效果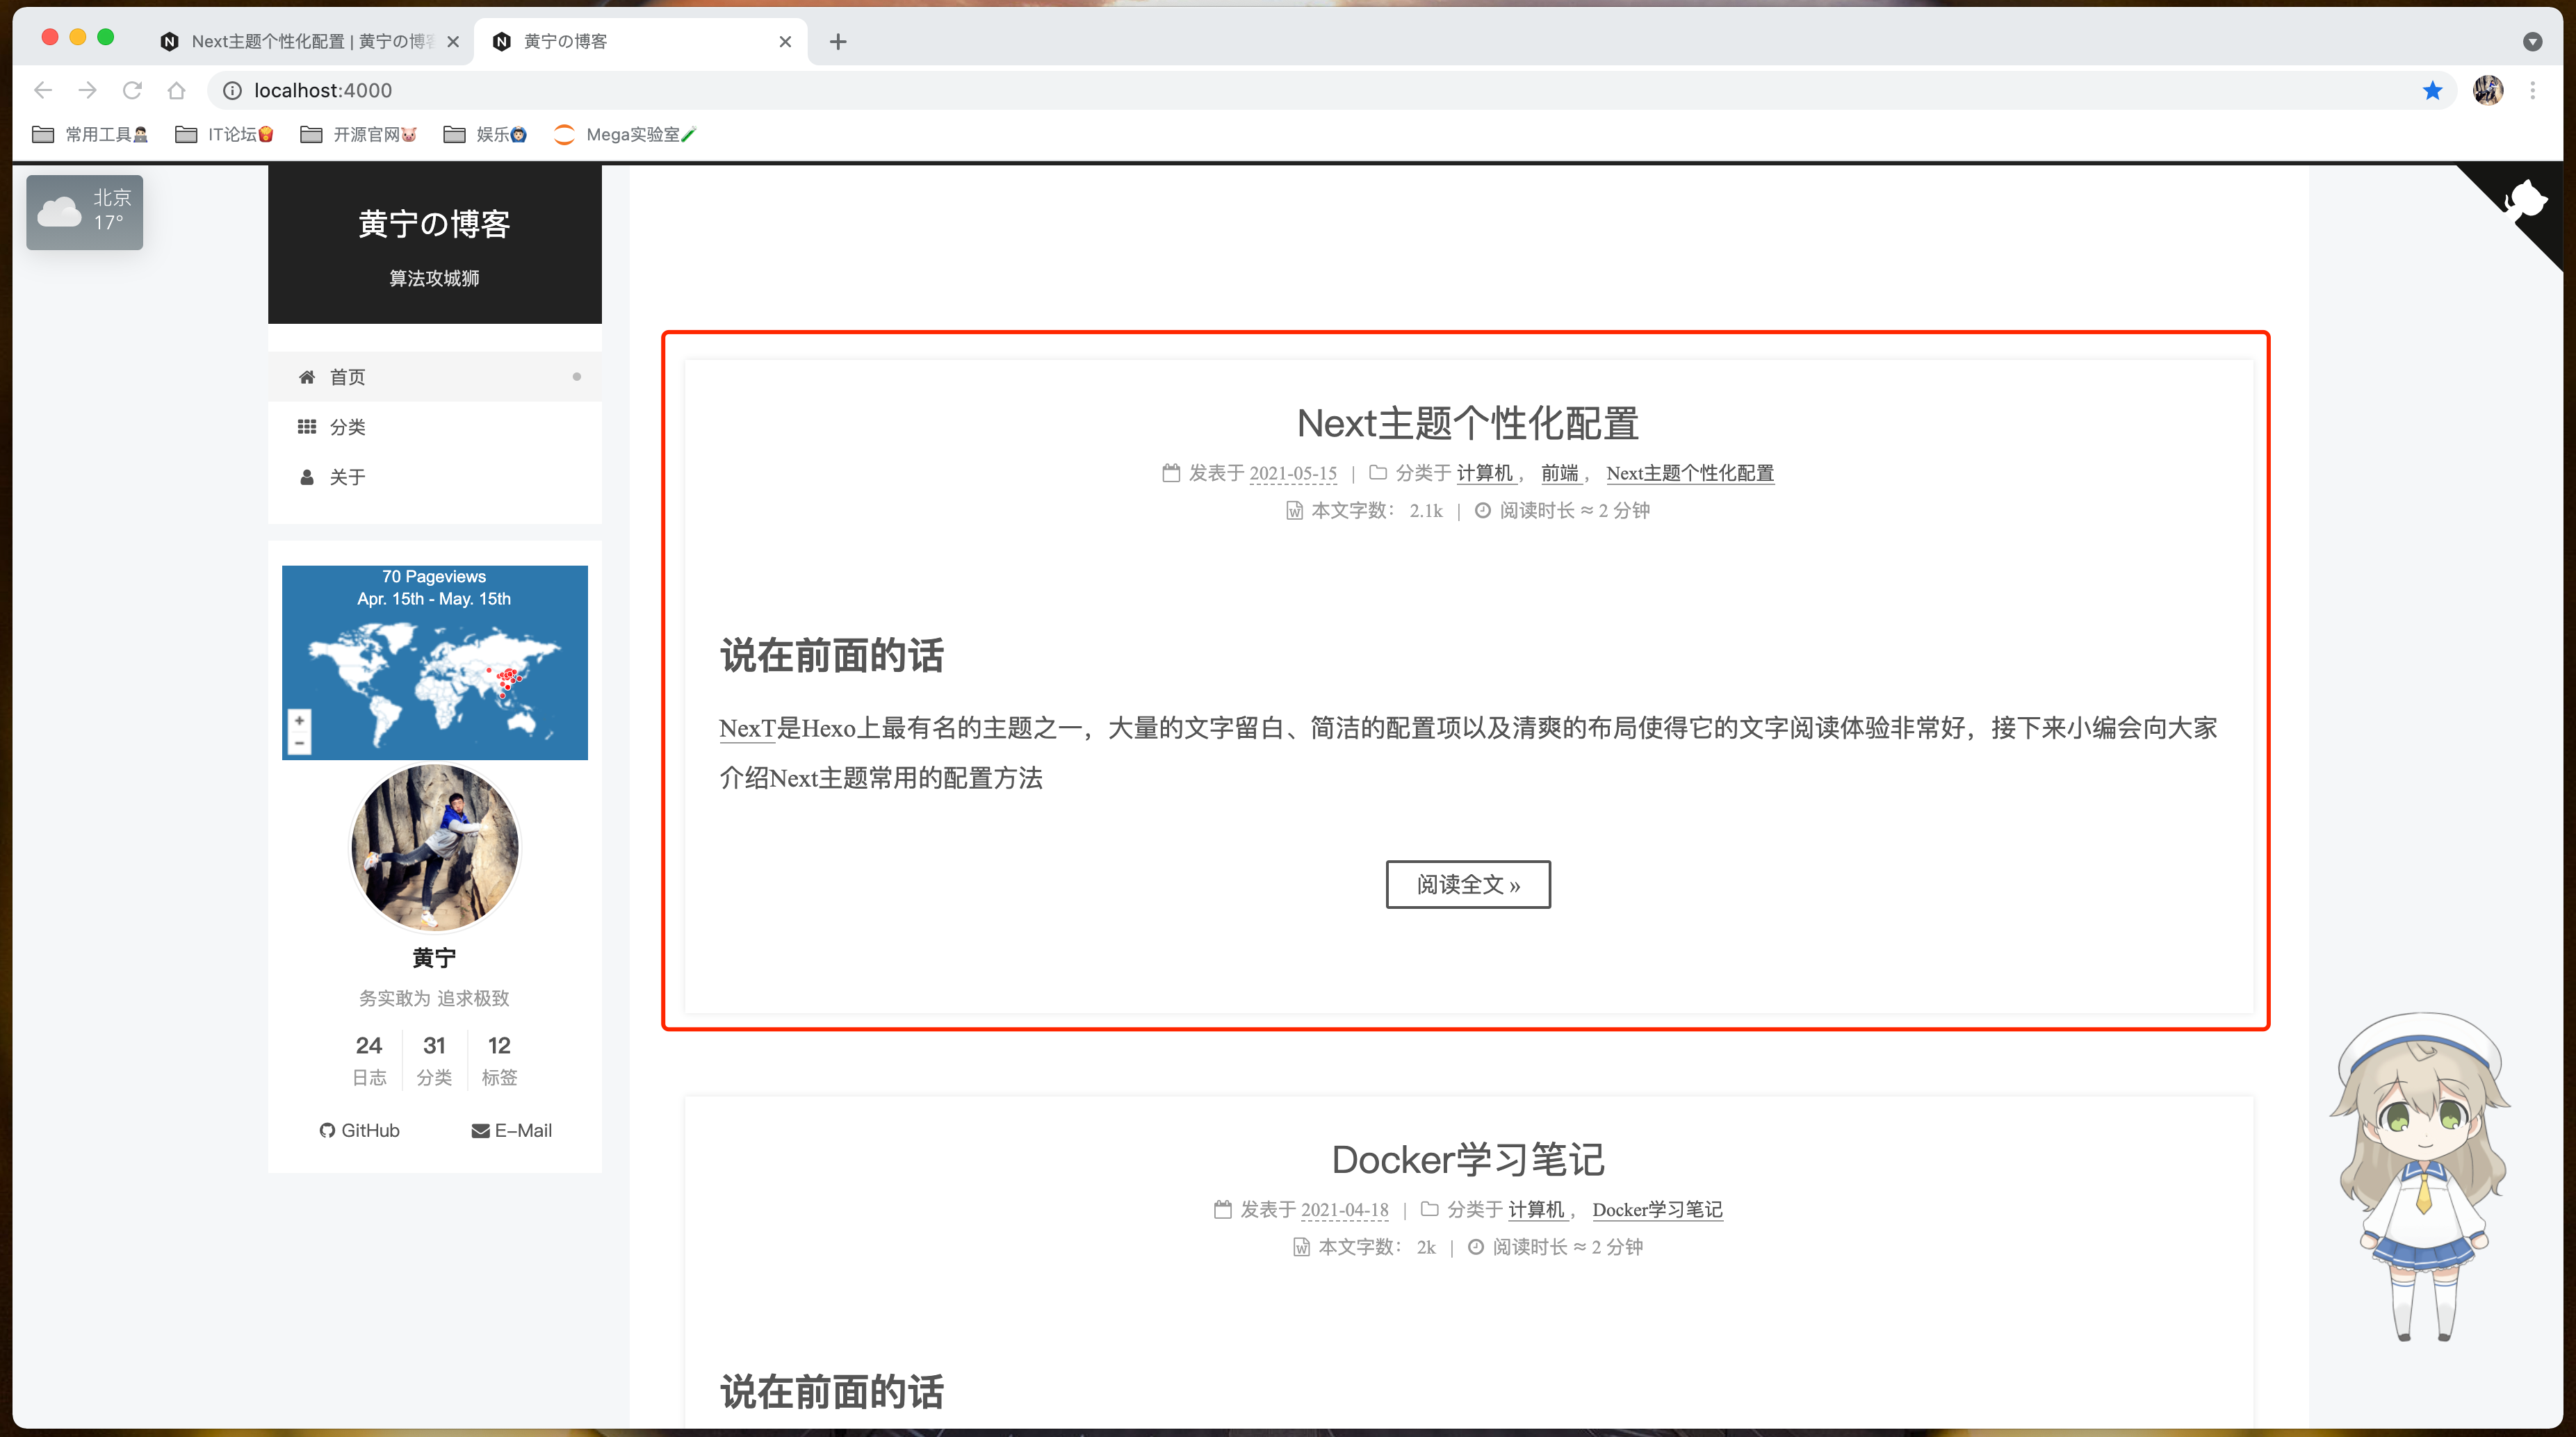
文章间距&分割线
将/themes/next/source/css/_common/components/post/post-eof.styl修改成
.posts-expand { |
侧边栏
显示位置
在/themes/next/_config.yml中找到sidebar字段
# 设置侧边栏的位置 |
菜单
themes/next/_config.yml,修改menu字段
# --------------------------------------------------------------- |
关于我
Step1 新建一个about页面
hexo new page "about" |
这时候在站点的source下会新生成一个新的文件夹about,在该文件夹下会有一个index.md文件
Step2 在 themes/next/_config.yml 中将menu中about前面的注释去掉
# 设置侧边栏菜单 |
头像
编辑主题的themes/next/_config.yml,新增字段 avatar
# Sidebar Avatar |
其中,URL可以是完整的互联网 URL,也可以是本地图片存储路径source/images/
社交链接
编辑主题的themes/next/_config.yml,新增字段 social,然后添加社交站点名称与地址
# Social Links |
配置成功后就会有
看板娘
在博客目录下安装依赖
npm install --save hexo-helper-live2d
编辑站点下的
_config.yml,新增字段live2d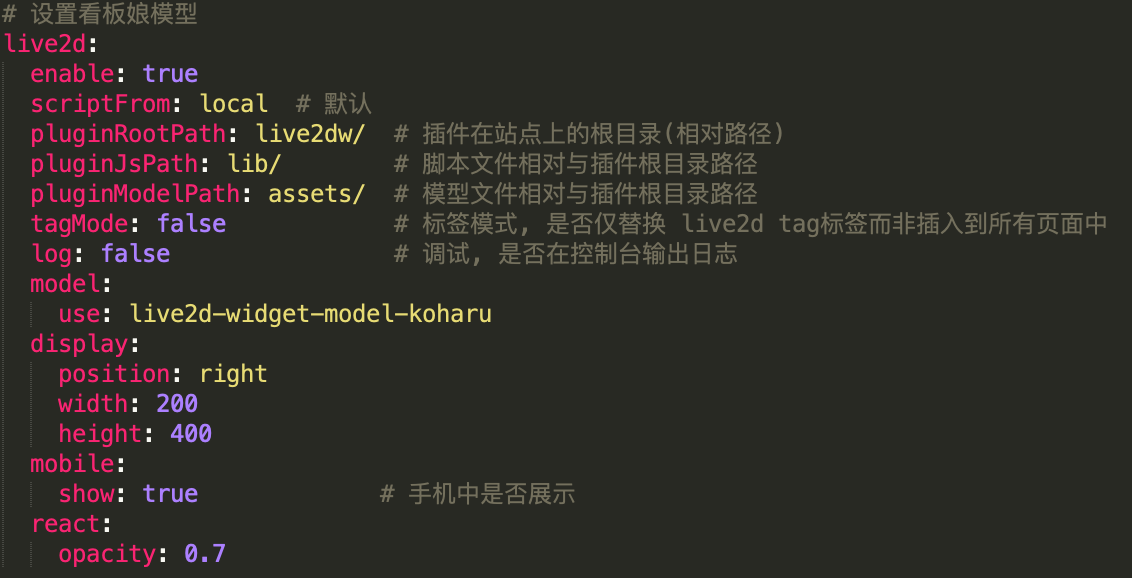
使用其他的模型,需要先安装模型,在修改配置信息中的
use安装模型
npm install 模型的包名
取消看板娘
npm uninstall 模型的包名
并且去掉站点下的
_config.yml下的相关看板娘配置信息即可
增加 Github Corner
1) 到GitHub Corners选择自己喜欢的图标,然后copy相应的代码
2) 将刚才复制的代码粘贴到
themes/next/layout/_layout.swig中<div class="headband"></div>的下面
3) 把代码中的
href后面的值替换成要跳转的地址,比如你的GitHub主页增加 LiveRe评论系统
注册账号
打开来必力官网:https://livere.com安装
点击上方的安装,选择免费的city版本,并点击现在安装,复制出现的uid字段打开主题目录下的
blog/themes/next/_config.yml配置文件,定位到livere_uid字段,粘贴上刚刚复制的uid
效果展示

天气预报
- 登录https://www.seniverse.com 登录注册的账号
- 获取天气插件代码
- 将代码插入到
/themes/next/layout/_layout.swig文件的</body>标签之前
- 重新部署网站,就可以在首页看到心知天气的插件
统计访问指标
访问 Enter your website address 添加自己的网站地址

登录之后选择自己喜欢的插件格式

将代码插入到
/themes/next/layout/_macro/sidebar.swig文件的
重新部署网站,就可以实时在首页看到访客来源图